This has happened to most of us more than once: You receive very important documents by email that you need to sign, then you have to print them, sign them, scan them, and then send them back by email. But what if you don’t have a printer? or you just don’t want to go through all the steps above when you can do everything from your computer. If you have a Chromebook and preferably (but not necessarily) a stylus, then you’re in luck.
Advertisement
ChromeOS natively uses the Chrome Browser PDF Viewer when opening PDFs and may soon start using the Media or Gallery app. Luckily, both apps support PDF annotation, which is what we need to add a signature. For the purposes of this tutorial, we’ll walk through the steps using the current default Chrome PDF viewer. Check out the steps below:
Necessary material
To do this, you will need a Chromebook with a touchscreen. Although not entirely necessary, you’ll get better results if your Chromebook also supports pen input and you have a compatible pen. An example would be using the Lenovo Chromebook Duet 5, which supports USI, and any USI stylus. However, if you don’t have a stylus, you can achieve similar results by having a Chromebook with a touchscreen and using your finger as a stylus.

Opening your PDF
You’ll have to make sure your PDF is downloaded to your Chromebook to start things off. I would suggest saving it to the “Downloads” folder for easy access when you need it. Next, double-click (or double-tap if you’re in tablet mode) to open the filewhich should, by default, open with the Chrome PDF Viewer.

Sign your PDF
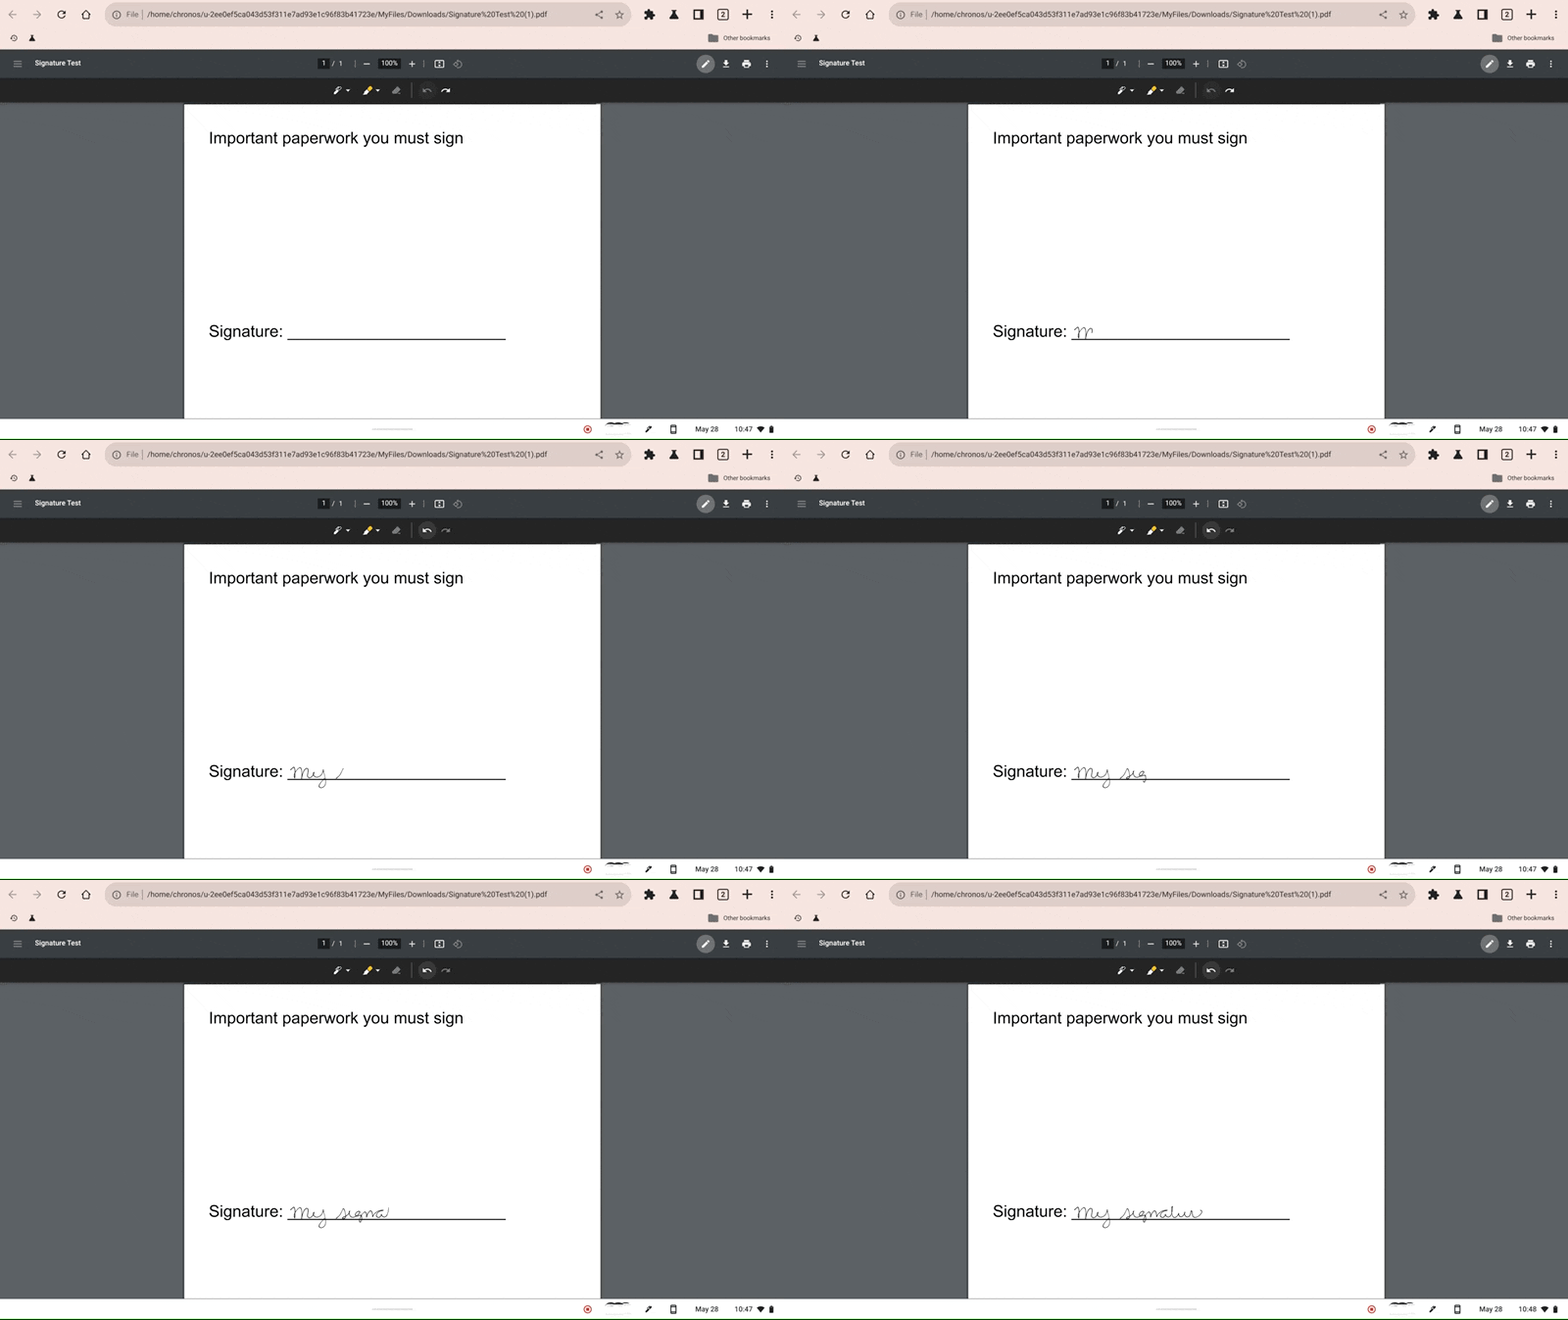
Once the file is open in Chrome, tap the pencil icon to enter annotation mode. This will give you access to different annotation tools such as pen, highlighter and eraser. Choose the pen tool and select the desired color and thickness.


Once you have dialed in these options, you can sign your document with your stylus or your finger. Once signed, tap the download icon and select to download with your changes. This way, your uploaded file preserves your signature. Next, select what you want to name this new file and save it.


I just want the steps!
- Save the PDF you need to connect to your Chromebook’s “Downloads” folder.
- Open your PDF by double-tapping or double-clicking it.
- Once the PDF is open in Chrome, tap the pencil icon to enter annotation mode.
- Select the pen annotation tool and choose a pen color and thickness.
- Sign your document with your stylus or finger
- Press the down arrow button to download and select for upload with your changes.
- Last name your signed document and save it.
Your signed PDF will now be saved to your Chromebook so you can attach it to an email or upload it to the web if needed. It’s a very productive way to sign your documents in half the time while taking advantage of the technology you already have access to. The only thing that would improve this, in my opinion, would be to be able to save and reuse our signatures as you can with applications like Adobe Sign or FoxIt. However, it will work great for signing things in a snap without having to download and configure third-party apps.


